Deploy a Simple Website using Nginx, GitLab, Docker, ECR
This project documents the necessary steps needed to launch a Nginx webpage using Docker, GitLab Pipelines, Git, and ECR. This automation deploys the website from Docker then uploads the Docker image to an ECR repository.
Contents
- Create Project in GitLab
- Setup AWS
- Setup GitLab Pipeline
- Setup Local Environment
- Create GitLab Yml Components
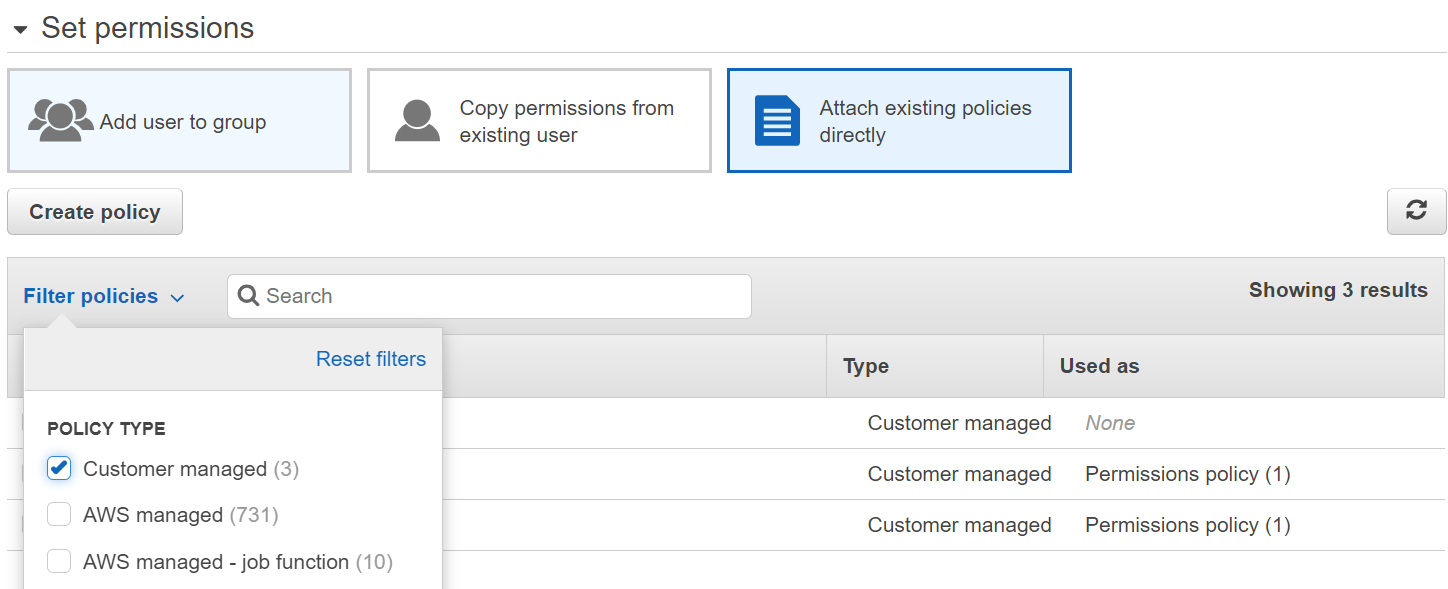
I. Create Project in GitLab
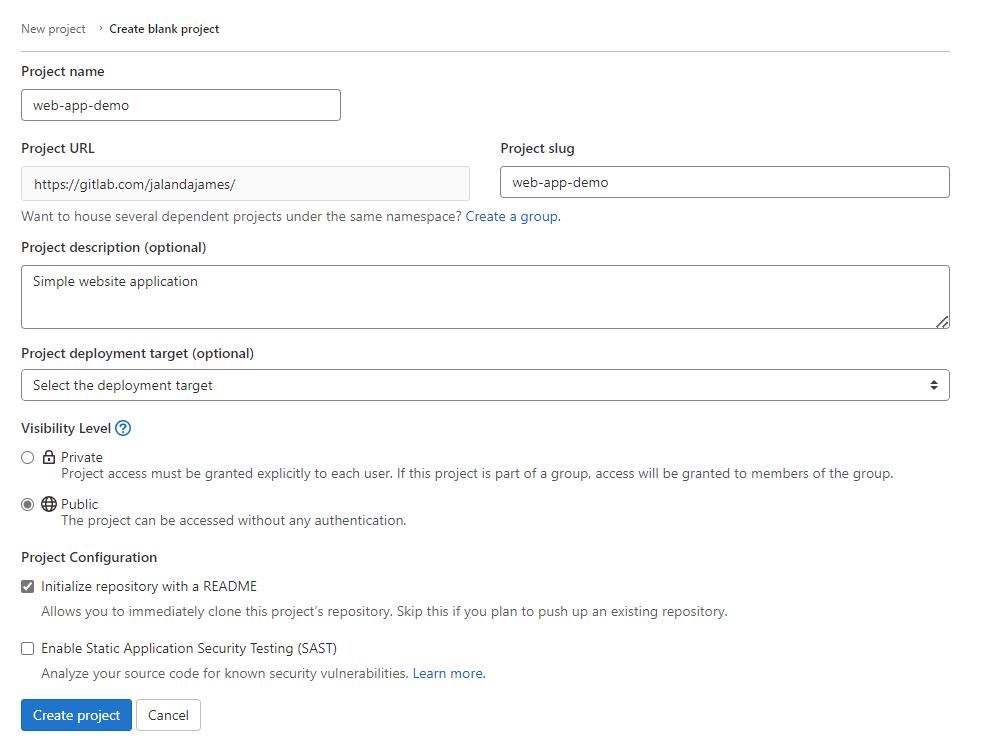
1. Create Project in GitLab.
Set the visibility level to public so your web app is visible to the public.
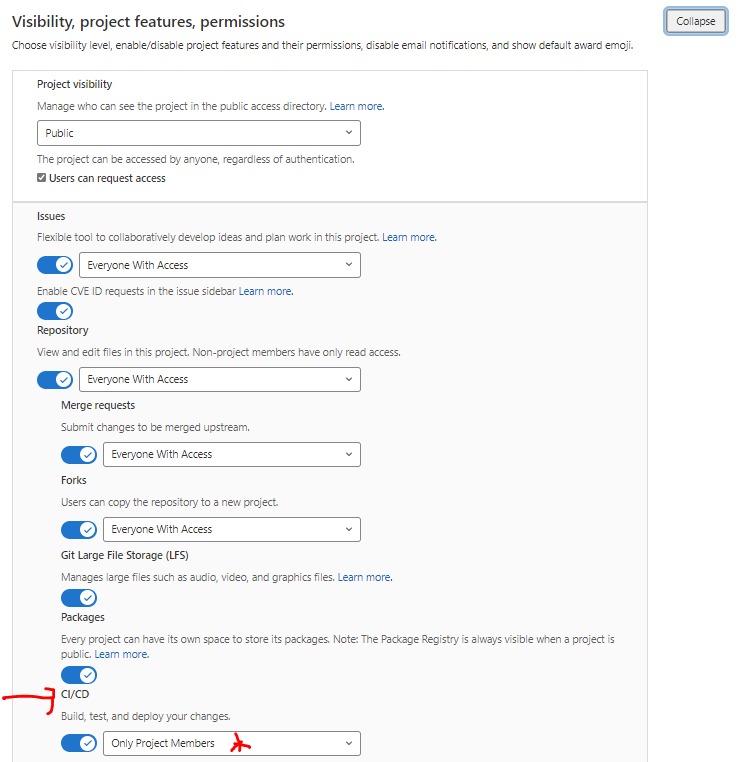
2. Change CI/CD Setting in GitLab. Settings > General > Visibility, Project Features> Permissions > Expand > CI/CD > Only Project Members
-
a. Make your CI/CD “Private” and “Only visible to members of the project”. By default all CI/CD pipeline logs are set to public. You should set them to private to prevent sensitive information (like your AWS secret key) from accidentally being displayed in logs.
-
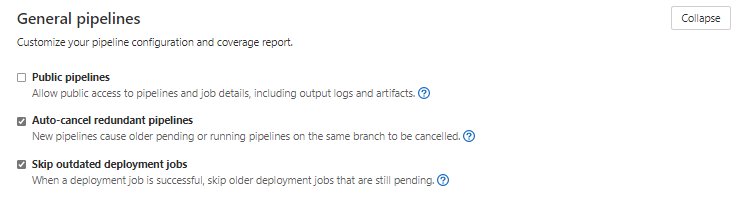
b.Change CI/CD Settings under General CI/CD > General Pipelines > Uncheck Public Pipelines and save. The second place you can change privacy settings for the pipeline is under General pipelines in CI/CD.
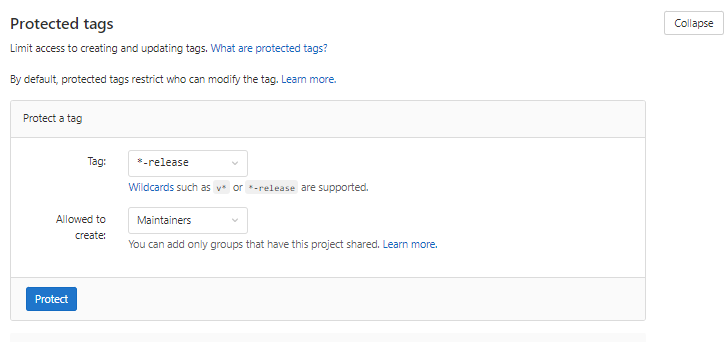
3. Setup Protect Tags & Branches For Pipeline
Settings > Repository > Protected Branches > Expand >
Protected branches restrict who can modify the branch.
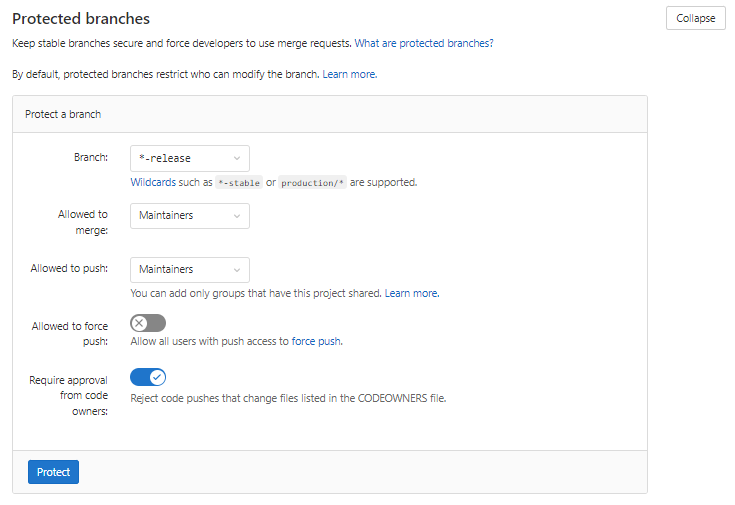
Branches ending in the wildcard branch name will deploy when certain branches are created. You must indicate whom will able allowed to merge and push protected branches. Select “maintainers” so that only maintainers are allowed to trigger deployments of the code. In the example below, any branch ending in “release” will be protected. These settings also trigger the pipeline to start.
- a. Create Protected Tags
Tags must also be protected. After setting a tag wildcard, you must limit access to whom gets to create and update tags. Protected tags can also be used to trigger pipeline activation.
4. Clone Project. After you have the correct settings, you are now ready to add the project to your local computer. Copy the clone address (ssh version) of your GitLab project and open in your code editor. I used Visual Code Editor.
II. Setup AWS
5. Setup AWS ECR. This project involves using a light Nginx web server packaged into Docker image. Amazon Elastic Container Registry (Amazon ECR) is a service that allows you to store Docker images. It’s similar to Docker Hub except that it’s located within Amazon and allows you to control IAM policies.
-
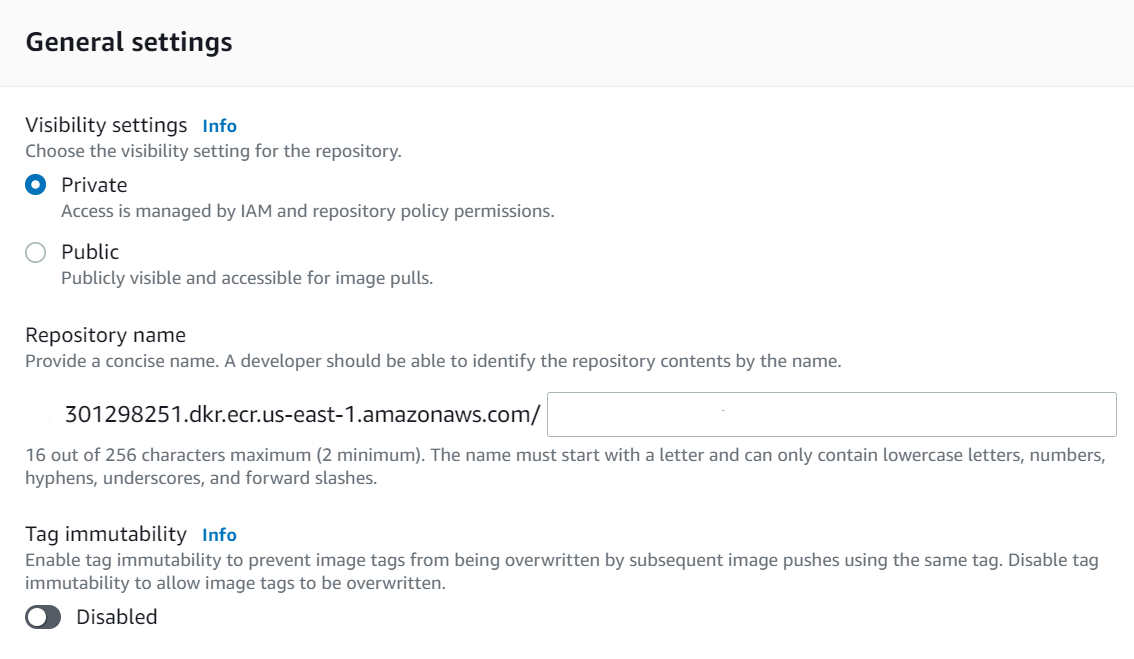
a. Create a new registry in AWS ECR. Sign-in to your AWS account and select ECR. Make sure you select the correct region, as ECR repository can be created in multiple locations. It’s recommended to name your repository the same name as your project so that it’s easier to recognize across your platforms.
-
b.** Setup IAM User for Pipeline.** This user will be used by GitLab to push images to the repository.
-
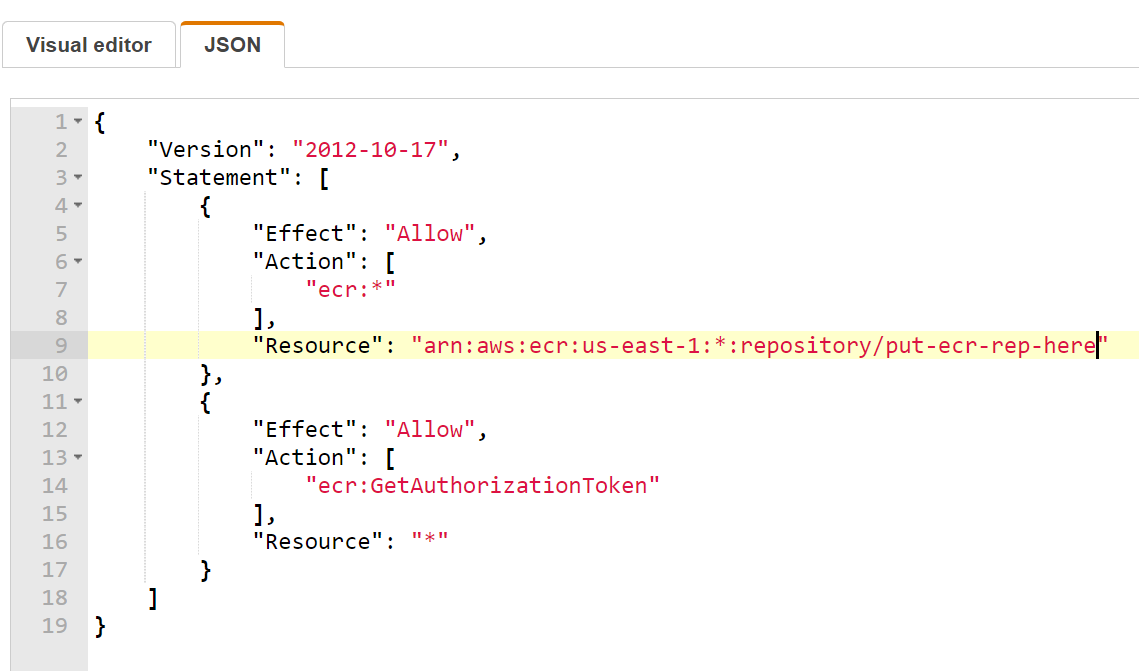
c. Create Policy Create a policy to limit the amount of access the user has. This policy states the user who has this policy assigned to it will only be allowed to push images to the specific ECR repository you created earlier. Name the policy something descriptive so that you can easily recognize it later. Example: SimpleAppPushECR
-
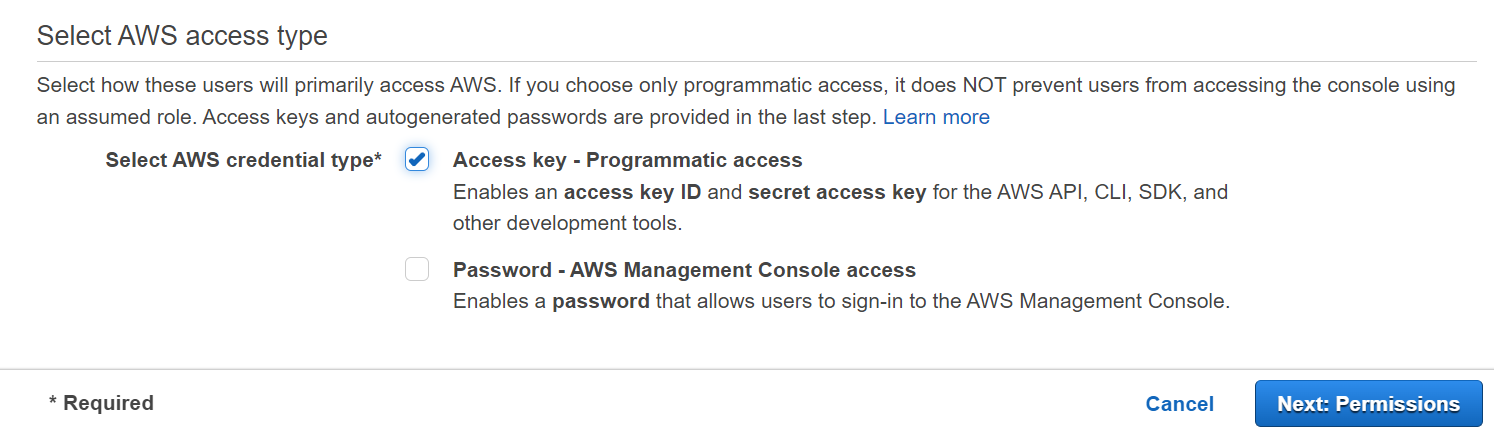
d. Create User After you create the policy, you’ll need a user to attach the policy to it. This computer based user only needs programmatic access. This means this user will never be able to log into the console. Name this user simple-app-ci or whatever reminds you this is a programmatic user only.
-
e. Attach Policy to User Click on “filter” to quickly find your newly created policy. Select the correct policy and click next. Add tags if needed and review user details. If correct select create user. Keep this page open as you’ll need security credentials of this user to add to GitLab.
III. Setup GitLab Pipeline
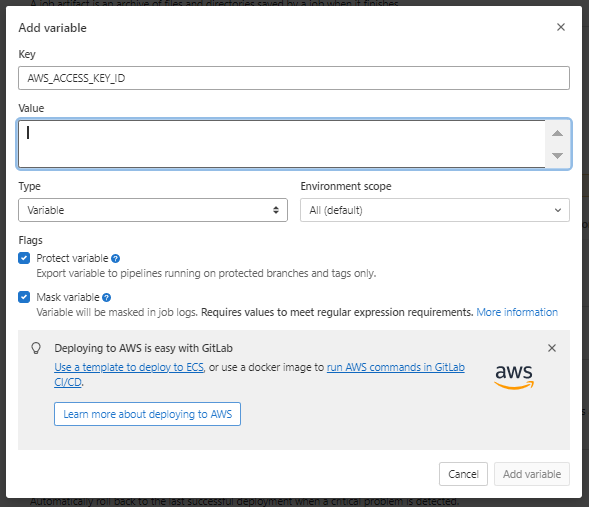
6. Add ECR User Credentials To GitLab
Variables are necessary to encrypt information, like passwords and secret keys, that you may use in job scripts instead of using your credentials in plain sight.
-
a. Set Variables Settings > CI/CD > Expand Variables > Add Variable. Add the details of the computer only user. The variables must be named exactly as below as they will be called upon later.
-
AWS_ACCESS_KEY_ID = AWS_ACCESS_KEY_ID (copy from your IAM User account)
-
Turn on protected which means only approved users will able able to access this credential.
-
Turn on masked. It masks the variable in the CI/CD output and not visible in console logs.
-
b. Create a second variable called AWS_SECRET_ACCESS_KEY using the same steps above.
-
c. Create a third variable called ECR_REPO. Copy the ARN details from the ECR repo you created. Select protected. (Mask is not an option since the ARN is too long).
IV. Setup Local Environment
7. Create a feature branch. When working on changes it’s best to work in a feature branch versus your main branch. This will allow an opportunity for your changes to be tested and reviewed before they are pushed to the master branch to ensure code stability. From your project directory enter the command below:
git checkout -b feature/nginx
This will create a new branch called feature/nginx. Verify which branch your in with the command below. “*” indicates the current directory. 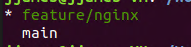
git branch
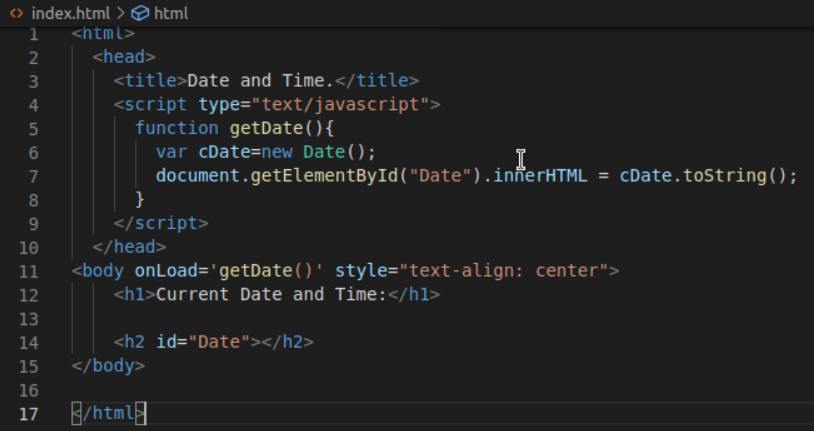
8. Create Nginx files
Create a index.html and javascript.js page in Visual Code Editor. This simple current time app is simply an index.html page and javascript.js page. You can add whatever you want to those pages. Nginx comes with it’s own index.html page that’ll you’ll need to override via a Dockerfile command. 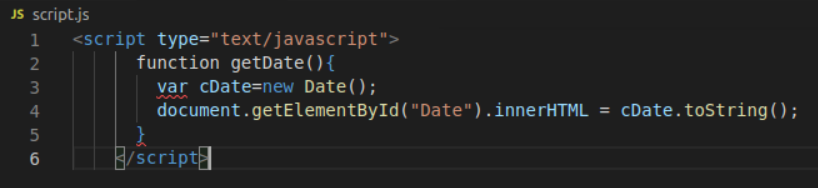
This is the HTML index page.
9. Create a Dockerfile and build the image. You’ll see a success message if your build was completed correctly. 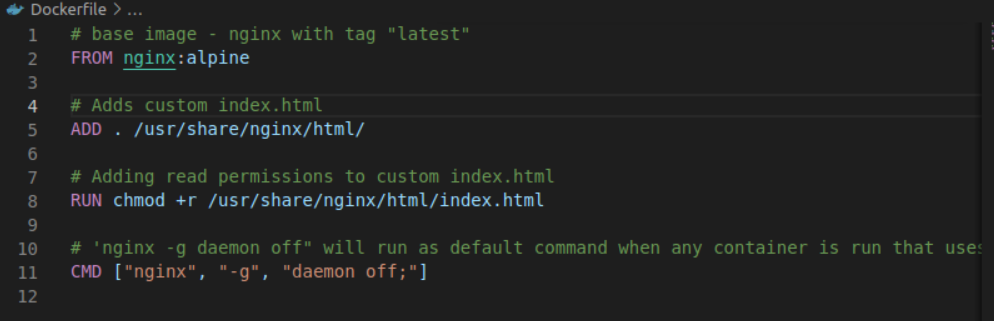
docker build -t name_of_your_image .

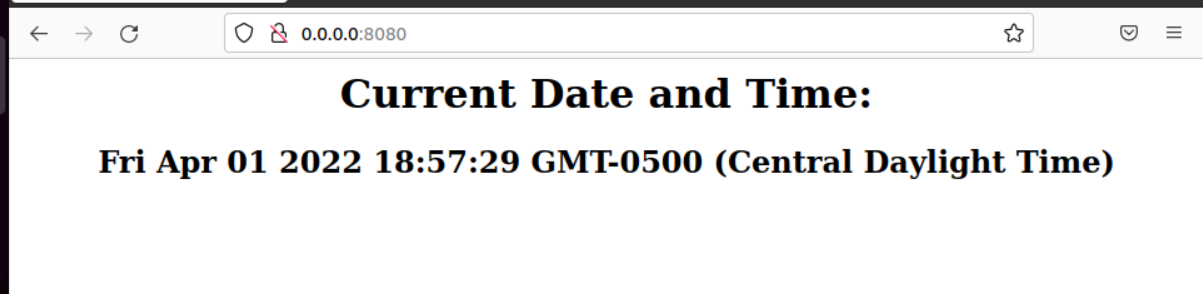
10. Test Your Docker Image
docker container run -d -p 8080:80 name_of_your_image:latest
11. Confirm Docker container is running.
docker ps
You can view your web page (the link is listed in the output from the command above).
0.0.0.0:8080
Once you’re satisfied with the changes. You can commit your change to Git.
git add .
git commit -am "comment here"
git push origin
V. Create GitLab Yml Components
12. Create a GitLab Ci Yaml File. This file uses GitLab release flow to trigger jobs from tags specified in the .gitlabci-yml file.Create GitLab Yaml file to create pipeline. The file must be named .gitlab-ci.yml. (Don’t forgot the “.” in front of gitlab or it won’t work). Substitute “proxy” with the name of your image.
The file is a little complex. But here is a quick breakdown highlighting different components.
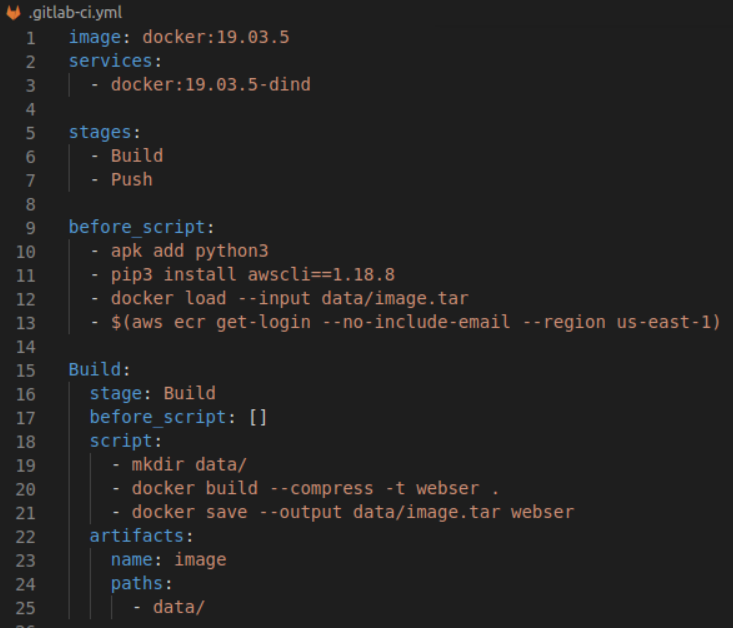
-
a. Define Docker Image for GitLab Build GitLab-CI uses Docker images to run the pipeline. This image is different from the one used in the project Dockerfile. This image is only used for the build and deployment process of the pipeline.
-
b. Define Service This allows Docker to use Docker within Docker.
- c. Define Stages In Pipeline
- Build = Used to build image
- Push = Used to push image to ECR
-
d. Define Build Job This section defines the build job. You can have both a “Build” stage and a “Build” job. Artifacts allow you to pass files from one job to another.
-
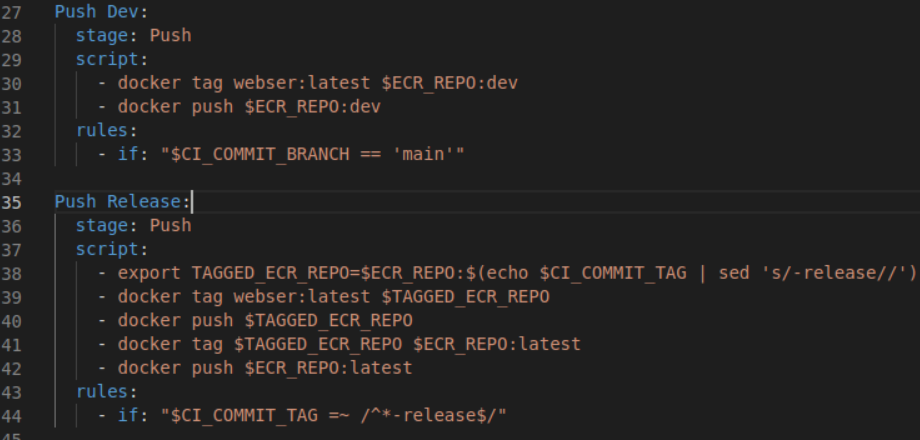
e.Define Push Job Python needs to be installed so you can install AWS CLI to connect to AWS to upload the Docker image. This script logs into AWS to upload the Docker Image to ECR repository.
-
f. Define Rules This specifies this job will only run the job when certain conditions are met. In this script this job will only push images to ECR when the commit branch is “main”.
- g. Define Release Job Anytime a release job is ran a release tag will be attached and trigger the job to run. This script removes the release tag and pushes the image up to the ECR repository.
13. Test Pipeline Commit changes to git and push changes to origin. This should trigger your GitLab pipeline to run. You should get an error message after “git push origin”. Simple copy and paste the corrected command that that should push and create your new branch.
14. CI/CD > Pipeline Go to your project in GitLab.com and check out your CI/CD Pipeline to review the newly triggered build stage. (Please note you are charged for build time. You get 400 minutes on free accounts. This build should take about 1 minute).

15. Merge requests > New >Select Source Branch > After you get a success message (checkmark), create a merge request to merge the changes into the master select your current branch (“feature) and then select “Compare branches and continue”. Here is where you would assign another developer to review your project if you had any. If you don’t keep the defaults. Also keep “delete source branch…” selected as this deleted unneeded branches and keeps your pipeline clean. After making changes select “submit merge request”.
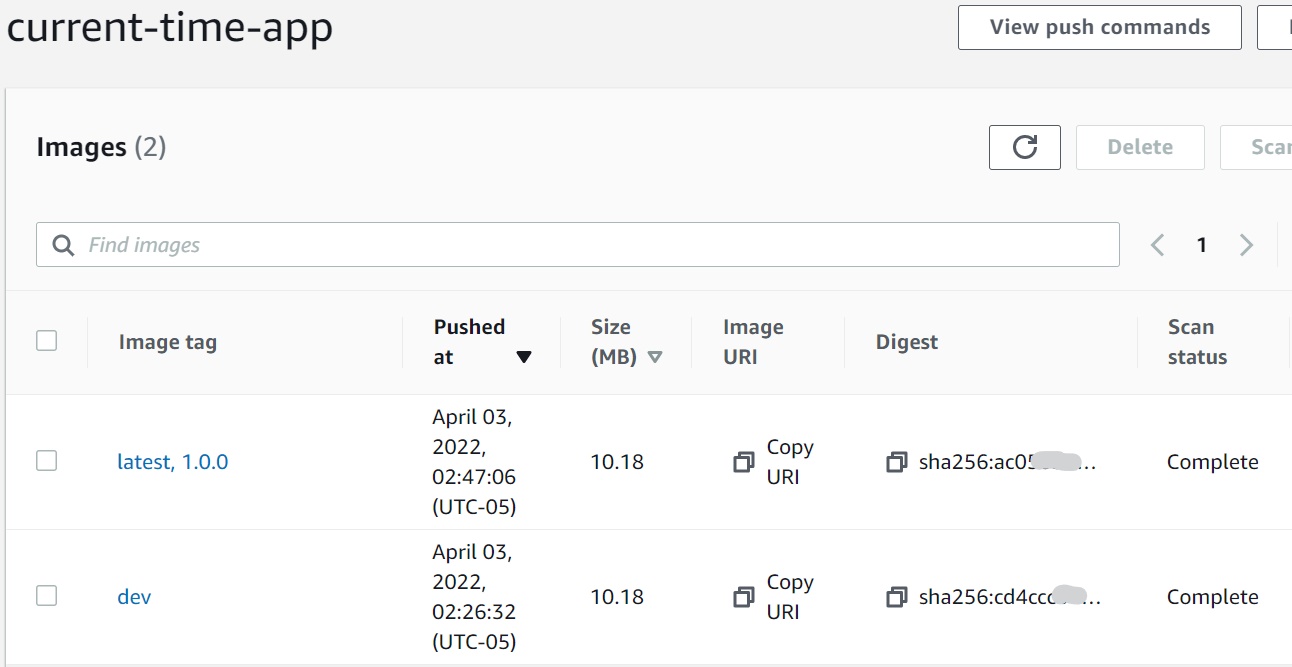
A new merge request should have been triggered. The job will start the second phase and add a “dev” tag to the job which will trigger AWS and push your Docker image into your ECR repository. Double check marks means your build is complete and successful for your branch.

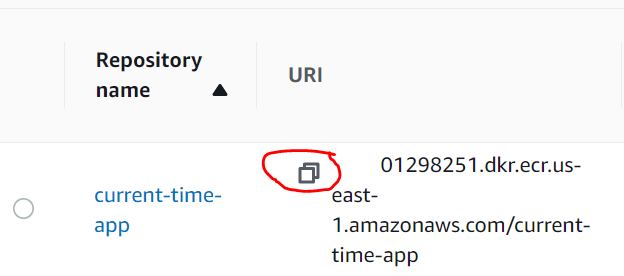
16. Review Job in ECR Repository
17. Create Release Tag
After testing you can push a release version. Create a release branch. Name the branch 1.0-release which the same name as the protected tag.

Name this tag with the same ending as the protected tag. Creating this tag will trigger a job and rush a release image up to ECR.
I used semantic versioning to name this tag. 1.0.0 stands for Major, Minor, Patch version.
That’s it. This is a long project that combines multiple components. I hope this was helpful.